Showing posts with label Desserts. Show all posts

Friday, October 9, 2015

Red Berries and Cream Cheese Muffins

Red Berries and Cream Cheese Muffins I www.haideekitchen.blogspot.com


I have been in a shoot hiatus for months. The photos in my last blog was shot back in March, that was 7 months ago! My Stockfood account manager has been asking me for new materials and I have not submitted anything new. I just couldn't find the time to do a proper shoot!

But I miss it. I love the creative process; from planning, sourcing the ingredients, to cooking, plating, the actual shoot and the post-process. It is not easy being a one-woman-team: I'm the cook, the stylist and the photographer so that means it's 3x the work and takes 3x longer to produce. But I am not complaining. In fact, I wish I could find time to do this more often.

Good thing there was a long weekend a few days ago, I finally got time! There was also an added motivation to shoot; a food photography contest with Andy Harris, editor of Jamie Magazine, as one of the judges. I thought, wouldn't it be cool if I win? So I gave it a shot, (literally!). What have I got to lose except a few hours of sleep, right?

So, 2 of the photos here were submitted for the contest, can you guess which ones? I'm pretty pleased with the results and am happy to share them with you.

Now about the muffins.

This recipe is perfect for brunch, snack or for a picnic in the park. It's still pretty hot in Bahrain but I'm already looking forward to going to the parks in the winter. This will also be good as holiday gift or to take to potlucks for Christmas breakfast.

The recipe for the muffins was adapted from Gather for Breads' Raspberry Cream Cheese Muffins and the streusel topping from The Girl Who Ate Everything's Blueberry Streusel Muffins. I love their blogs, you should check them out!

Red Berries and Cream Cheese Muffins I www.haideekitchen.blogspot.com


Red Berries and Cream Cheese Muffins with Streusel Topping

Prep Time: 20-30 minutes
Bake Time: 17-20 minutes
Total Time: 37-50 minutes

Ingredients:

4 oz cream cheese, room temperature
1/2 stick of butter, room temperature
2 large eggs
3/4 cup caster sugar
3/4 cup full cream milk
1 tbsp pure vanilla extract
3 tsps baking powder
1/4 tsp baking soda
1/2 tsp salt
1/2 + 1/4 cup fresh raspberries
1/2 cup fresh red currants, stems removed + 1/4 cup with stems

For the streusel topping:
1/2 cup caster sugar
1/3 cup all purpose flour
1/2 stick of cold butter, cut into cubes

1/4 to 1/2 cup icing sugar for dusting

Instructions:

For the streusel topping:
1. Mix sugar, flour and the cold butter using your hand until you get a clumpy, sandy texture. Keep it in the fridge until ready to use.

For the muffin:
1. Preheat the oven to 425*F for at least 30 minutes.

2. Line 2 x 12-muffin pan with muffin liners. Set aside.

3. In a stand mixer fitted with whisk attachment, mix the cream cheese and butter on high speed until light and creamy, 1-2 minutes. Add milk and vanilla extract, (I use my homemade vanilla extract).

4. In a large bowl, sift together the flour, baking powder, baking soda and salt. Make sure all the ingredients are thoroughly mixed by whisking it a couple of times.

5. Add the dry ingredients into the butter and cream cheese mixture and mix well.

6. Using a spatula, fold in 1/2 cup of the raspberries and 1/2 cup of the red currants.

7. Put half of the remaining berries into the muffin liners, ( roughly1 raspberies, 2-3 red currants).

8. Using an ice cream scoop, pour the batter into the muffin liners. Decorate the top with the remaining berries then sprinkle with streusel topping. Bake for 450*F for 5 minutes then lower the temperature to 375*F and continue baking for another 12-15 minutes. Check for doneness by inserting a toothpick in the middle of a cupcake; when the toothpick comes out clean, it's done!

9. Cool in the pan for 5 to 10 minutes before transferring on to a wire rack. Cool for 30 minutes to 1 hour on the rack. Sprinkle powdered sugar before serving.

Makes 24 muffins.


Red Berries and Cream Cheese Muffins I www.haideekitchen.blogspot.com


Red Berries and Cream Cheese Muffins I www.haideekitchen.blogspot.com


Red Berries and Cream Cheese Muffins I www.haideekitchen.blogspot.com


Red Berries and Cream Cheese Muffins I www.haideekitchen.blogspot.com

Red Berries and Cream Cheese Muffins I www.haideekitchen.blogspot.com


09 Oct 2015
Haidee's Kitchen

Tuesday, February 10, 2015

Sans Rival Macaron


Sans Rival Macarons I www.haideekitchen.blogspot.com


I was missing home...as in my home country, the Philippines. I have been living in the gulf for almost a decade. And although I love living in Bahrain, there are still some days when I get "homesicked"...I miss home.

It was one of those days. I was missing my family, their loud laughter and warm hugs, their spontaneous "I love yous" that sound way better in person than over the phone. Hanging out with my friends. Road trips. The beach. Oh! the beach. When the gulf summer seems it will never end, that's when I miss Boracay the most. And of course, the food, glorious "Pinoy" food!

Whenever I go home on holidays, I prepare myself to gain weight and just let myself go and indulge on all the food that I missed. I would have a mental list of what I would like to eat. But it seems our visits, no matter how long or short, were never ever enough to revisit all the yummies in my check list. One of those cravings that I missed on my last trip was Sans Rival Cake.

Sans Rival Cake may sound French, (well actually it is), but this confection is a well-loved Filipino dessert. It's a multi-layer of meringue, buttercream and chopped roasted cashew nuts, covered with butter cream and roasted cashew nuts. Yes, it sounds incredibly good that it's name claimed it is "without rival".

So I was craving for this cake and feeling bummed that no one is making it around here. The closest meringue-ish dessert is macaron, which on normal days I would love to have in any flavor. But even that will not satisfy because I was craving for buttercream sandwiched between the meringue. And then I had an epiphany...what if I make macaron with sans rival filling? I imagined it and in my mind and was convinced it would work. The only problem is...I've never made macarons before nor have I ever made Sans Rival cake.

So I began my search to find the perfect recipe to merge these 2 greats to create one genius dessert. Many webpages later, I resolved to try out these recipe combination: Macarons recipe from Martha Stewart and the buttercream recipe from BakeHappy. How did it go? Har har har (like the laugh of an evil genius!) Eureka! It was a success! It is everything I imagined it would be!

I think it would be selfish not to share this discovery to the web world. After all, I wouldn't have done it without the help from Ms. Martha and Ms. Aikko's recipe. So here it is, enjoy!

Sans Rival Macaron Recipe

For the Macarons: Adapted from Martha Stewart's recipe, the directions were slightly modified.

Difficulty: (not easy for me!)

Prep Time: 20 minutes
Resting Time: 30 minutes
Baking Time: 14 minutes
Total Time: 60 minutes

Ingredients:

1 1/4 cups almond meal
1 3/4 cups confectioners sugar
1/4 tsp salt
4 large or 120g egg whites
1/2 cup granulated sugar
1/4 tsp almond extract

Directions:
1. Preheat oven to 350*F.

2.Sift and whisk together almond meal and confectioner's sugar in a large mixing bowl.

3. In a stand mixer with whisk attachment, whisk egg whites on medium speed until frothy, about 1 to 2 minutes. Slowly add the granulated sugar and almond extract. Whisk on high speed until soft peak forms, about 3-5 minutes.

4. Fold egg whites into the almond and sugar mixture until well combined. Mix vigorously with spatula until the mixture sinks and smooth and thick and has the same consistency as honey. Transfer the mixture into a pastry bag with round tip. Pipe 1-inch round into a silicone macaron mould. Alternatively, pipe in 1-inch round, 1 inch apart on a baking sheet lined with parchment paper. You should be able to make 2 baking sheets of 28 macaron shells each. Tap the baking sheet to make sure there are no air bubbles.

5. Let it dry for at least 30 minutes until the tops are shiny and dry. 

6. Place the baking sheets on the middle rack and on the lowest rack and keep the oven door slightly ajar for the 1st 7 minutes. After 7 minutes, rotate both baking sheets 180* and switch-- the one on the middle rack to the bottom and the one at the bottom on the middle rack. Close the oven door and do not open until after 7 minutes.

7. Let cool in the baking sheet for 20 minutes then remove and transfer to the cooling rack to cool completely.

For the Cashew Nut Buttercream Filling, adapted and slightly modified recipe from Bake Happy:
3/4 cup caster sugar
1/2 cup water
9 egg yolks
3 sticks of unsalted butter, room temperature, cubed
1/2 pure vanilla extract
1/8 tsp fine sea salt
1 cup lightly toasted, chopped cashew news.

Special tool needed: Candy Thermometer (This is a must!)

Directions:
1. In a saucepan fitted with candy thermometer, boil sugar and water over high heat. Shake and swirl the pan occasionally to avoid sugar from browning on the side of the pan. While waiting, pour the egg yolks in a stand mixer fitted with a whisk attachment.

2. Once the sugar syrup registers 220*F on the candy thermometer, start beating the egg yolk on high speed. Turn down the speed to low or turn it off once the egg yolk is frothy.

3. As soon as the sugar syrup registers a temperature of 240*F, remove from hear and start beating the egg yolk at medium speed and pour the sugar syrup slowly and at steady stream. Increase the speed to high once the all the syrup have been incorporated and beat for 1 minute. Place in the fridge for 8-10 minutes to cool down.

4. Return the egg mixture to the stand mixer, beat on low speed then gradually add butter. Add vanilla extract and salt. Turn up the speed on high and whisk until fluffy.

5. Gently fold in cashew nuts with a spatula and place in the fridge for 15-20 minutes.

To assemble:
Take a heaping spoonful of the butter cream filling and sandwich it between macaron shells. If you wish, you can add more shards of chopped cashew nuts around the filling.

Sans Rival Macarons I www.haideekitchen.blogspot.com


I was still missing home but I was happy I got to taste a bit of it, with a twist, in my Bahrain kitchen.

Friday, December 13, 2013

Peppermint-Choco-Mallows Stirrers

I promised my friend, Joyce I will be posting the recipe for this treat, if you can call it recipe at all. There is no cooking involved and I made it with very little effort. It's a perfect gift for the holidays. In fact, I made this last year for Rocky to give-away to his friends.

So this is part of my holiday "Edible Gifts" series...my Peppermint-Choco-Mallows Stirrer-- store-bought marshmallows dipped in chocolate and covered with crushed peppermint candy cane. That's pretty much it, 3 ingredients, no cooking required. This ideally serves as a stirrer for hot cocoa or hot milk, let the peppermint and chocolate-covered marshmallows melt in the hot drink before you drink and enjoy. Some of Rocky's friends gobbled it by itself. I don't blame them, I may have had a stick or two,(...ok maybe more!), when I was packaging them, you know, for quality check.

It perfectly pairs with your hot drink especially on Christmas morning or after the "Noche Buena" (Christmas dinner). And, if you've been naughty this year, this might score you some "nice" points with Santa if you leave a stick next to his hot milk and cookies under the Christmas tree.


peppermint-choco-mallows stirrer I www.haideekitchen.blogspot.com

Difficulty: Super Easy!

Prep and Assembly Time: 30 to 40 minutes

What you will need:
1 pack popsicle sticks
Double boiler or heat-proof bowl set over simmering water
shallow bowl for the crushed candy cane
Baking sheet lined with parchment paper

Ingredients:
1 pack large white marshmallows, (approximately 50 pcs)
4 cups dark, milk chocolate or white chocolate, (1 used 2 cups dark chocolate and 2 cups of white chocolate)
10 x 8in peppermint candy cane, finely chopped

Directions:

1. In a double boiler or heat-proof bowl set over simmering water, melt/temper 2 cups of dark chocolate, make sure the water does not touch the bottom of the bowl. 
*Alternatively, you may melt the chocolate in the microwave, set on high, at 20 seconds interval until melted.
**For tips on tempering chocolate, click here.

2. Dip 1 inch of the popsicle stick in melted chocolate, stick into the marshmallows and immediately roll over the chopped candy cane. Let it stand to cool and harden on the baking sheet. Repeat process until half of the marshmallows are well coated.

3. Repeat the process using the white chocolate and the remaining half of the marshmallows and candy cane. Let it cool completely at room temperature.

Makes approximately 50 stirrers.

For more Edible Gifts suggestions, you may want to check these out:
1. Bourbon Dulce De Leche
2. Almond Butter Cups
3. Dark Hazelnut Butter
4. Vanilla Extract
5. Rocky Crunch

Merry Christmas and Happy Holidays from my kitchen to yours! xoxo


peppermint-choco-mallows stirrer I www.haideekitchen.blogspot.com


peppermint-choco-mallows stirrer I www.haideekitchen.blogspot.com

Tuesday, December 3, 2013

Bourbon Dulce de Leche


It's the most wonderful time of the year!

Christmas is just around the corner. My tree is up and decorated in gold and silver, my holiday table is set. Oh yes, we're on festive mode before December hits! Why? Why not!

If you're like me, you'd probably be collecting ideas of what to give to friends and family right about now. I put a lot of thought into it. I'm not Oprah that money is no object, but with little creativity and a bit of (fun) work, I can give my loved ones some of my favorite things. I started that last year, I decided to give them something handmade and homemade. I hope they liked them 'coz I sure enjoyed making them.

So I thought I'd share some of the recipes with you. You can find the links for the recipes on the home page under the label "Edible Gifts". They're so easy to make anybody can make them.

Here's one that I gave to some of my girlfriends, my Dulce de Leche spiked with Bourbon whiskey and spiced with Madagascar Bourbon Vanilla Beans. I loooove dulce de leche. It's great with vanilla ice cream, (way better than caramel!), on top of cupcakes, brownies and slathered on top of  my mom's "suman sa lihiya" (sticky rice wrapped in banana leaf). It's also good by itself, just grab a spoon, dunk it in the sticky pot and indulge!

It's simple to make but time consuming, that is if you take the route that I took. There are so many ways to make it, from simple to scary, (the thought of putting a can of condensed milk inside a pressure cooker gives me goosebumps!). The simplest I think is the method recommended by Donna Hay. I tried it many times but it does not give me the result I was looking for, I always get a darker top. And so I take the road less traveled and go for the longer method. Turns out perfect all the time!

Bourbon Dulce De Leche

Cooking Time: 60-80 minutes depending on the consistency and color that you like. It becomes darker as it as you cook longer.

Ingredients
2 x 395g can condensed milk
2 tsps Bourbon Whiskey
Beans of a 2 inch Organic Grade-A Madagascar Bourbon Vanilla Pod 
Pinch of Salt

Direction:
1. Slowly cook the condensed milk in a double boiler until it thickens and changed into a darker, caramel color, stirring occasionally. Careful not to let the water touch the bottom of the pot where the milk is in. Add more water into the double-boiler if needed.

2. Once you've achieved the color and texture that you like add the bourbon, vanilla beans and salt, stir until fully incorporated and remove from heat.

3. Let it cool completely before transferring into sterilized decorative bottles.

Note on Storage:
This will keep for 2 days at room temperature or up to 1 month in the fridge but might lose it's creamy texture. To reheat, transfer into a heat-proof dish and microwave at 15 seconds interval until you get the desired temperature and smoothness.

Enjoy!

Makes 2 cups


Monday, November 4, 2013

Carrot Cake


My sister came for a week visit last month and I promised to make her trip to the island worthwhile by bringing her to a few of my current favorite places to eat, (because there is nothing much to do around here but that), and to cook for her. She told me that wasn't necessary as the purpose of her visit was to spend time with his nephew. Still, I cannot let her go hungry. And so she let me drag her onto a weeklong gastronomic trip around the country.

I took her to the "new" Hash House in Adliya, the island's most happening place. The new ownerstotally revamped this resto. This now tops my list when I'm craving for Thai food.


Hash House

 Then, to my favorite place for afternoon tea, The Tea Room @ Trousseau. They serve the best scones which pairs perfectly with rose bud tea. Divine!


The Tea Room @ Trousseau

The Tea Room @ Trousseau

And of course I had to bring her to my favorite restaurant outside the city that serves delicious arabic food with a modern twist, Villa Mamas. The chef is also a forerunner in advocating organic, local products and produce in the restaurant scene in the island. Definitely a must try when in Bahrain.


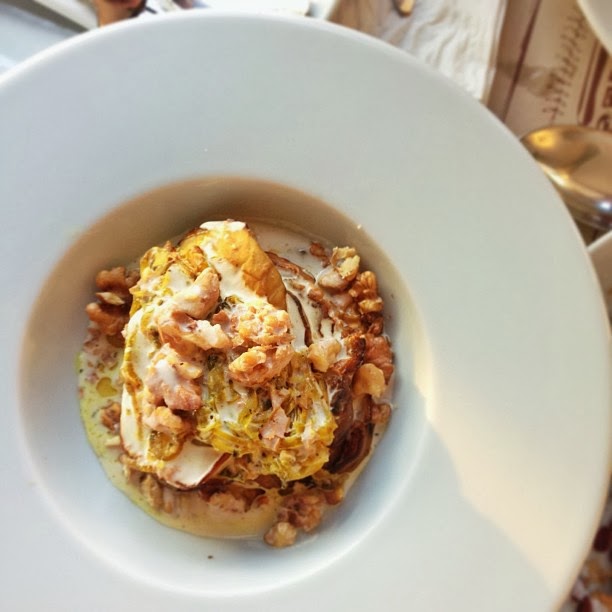
Eggplant Explosion, a modern twist on the Persian dish kashk-e bademjan @ Villa Mamas

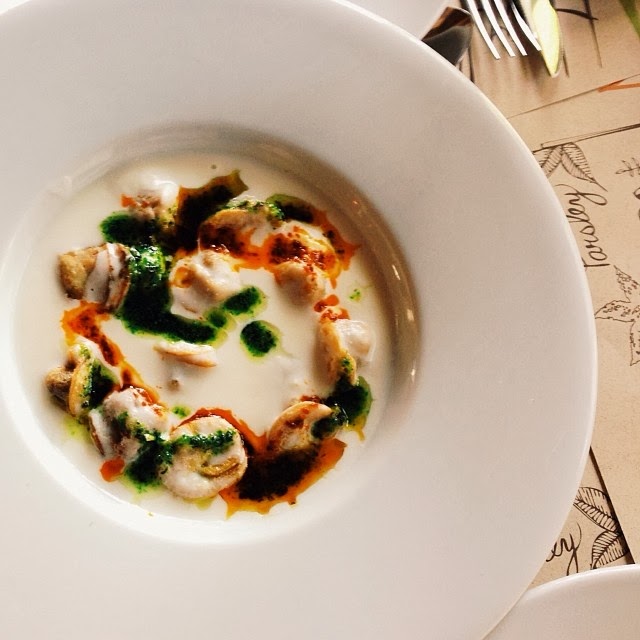
Shish Barak, lamb in wonton wrapper with yogurt sauce @ Villa Mamas

We visited several more but posting all the photos might be too much for this blog, (follow me on instagram instead!).

Memories

And because I also promised to cook for her, I made mushroom risotto with truffle oil for dinner and taught her how to bake this decadence, a 3-layer carrot cake. This cake has become a family favorite and I think it's time to share it with y'all.

The recipe was adapted and slightly modified from Chef Emeril Lagasse's recipe; (for the link, click here). The only modifications are: (1) I used only half of the pecans called for this recipe and sub the half with walnuts, because the husband is not a fan of pecans. And (2) for the frosting, the original recipe called of 1lb of sugar which I find too sweet for my liking, so I made my frosting with just 3 cups of sugar instead.

My sister's visit was short but sweet...even sweeter than cream cheese frosting. And that's what we live for. We may live miles apart but our hearts will always be together. And when we are together, we build memories that will last...until we meet again.


Carrot Cake with Cream Cheese Frosting
 
Prep Time: 40 minutes
Inactive Time: 60 minutes
Baking Time: 30-40 minutes
Total Time: 130-140minutes

Ingredients:

3 sticks, plus more for coating the pan, room temperature
2 cups caster sugar
2 cups all-purpose flour
2 tsps baking soda
2 tsps ground cinnamon
1 tsps salt
4 large eggs, room temperature
1 tsp pure vanilla extract
3 cups grated or (food processor) chopped carrots
1/2 cup chopped toasted pecans
1/2 cup chopped toasted walnuts

Cream Cheese Frosting:

8 ounces cream cheese
1 stick unsalted butter, room temperature
3 cups confectioners' sugar
1 tsp pure vanilla extract
1/2 cup chopped toasted pecans,
1/2 cup chopped toasted walnuts

Directions:

1. Preheat oven at 180*C.
2. Prepare 3 (9in) cake pan, coat inside of the pan with butter, line with parchment paper, then coat again with butter. Set aside.
3. Sift dry ingredients together, (flour, baking soda, cinnamon, and salt). Mix well.
4. In a stand mixer with a paddle attachment, cream butter for 1 minute or until smooth. Add the sugar and beat over medium speed until light and fluffy. Alternately add eggs and dry ingredients over medium speed. Add vanilla extract. Add carrots and beat until well mixed. Then fold in the nuts. 5. Divide the mixture into 3 pans and bake for 30-40 minutes. Check with a toothpick or cake tester, if the toothpick inserted in the middle of the cake comes clean, the cake is done. *I usually like my cake really moist and don't go over 30 minutes. But, since I'm making a 3 layer cake, I let it bake a little longer so the bottom layer withstand the weight.
6. Cool in the pan for 30 minutes. Remove from pan and let the cake cook for a further 30 minutes on the cooling rack before icing.

For the Frosting:

7. In a stand mixer with a whisk attachment, whisk the cream cheese and butter until light and fluffy. Gradually add the sugar over medium speed. Once all the sugar is incorporated, crank up the speed to high and mix for a further minute. To assemble:
8. Line 3in parchment paper around the cake stand. Place bottom layer cake. Frost the top, about 1cm thick. Sprinkle half of the mixed chopped nuts. Top with the middle layer and repeat the process. Finally add the top layer and frost generously with the remaining frosting.


Update, 16 Sep 2015: My sister came to visit again a 2 weeks ago and she requested I make her this cake again which I gladly obliged. This has now become a family favorite.

Carrot Cake I www.haideekitchen.blogspot.com

Thursday, August 22, 2013

Almond Butter Cups


Hey! mums, are you running out of ideas to keep your kids entertained for this seemingly endless summer? Hang in there, only few more days and it's back to school! In the meantime, here's a yummy treat to serve on playdates... a better, healthier version of that addicting Reese's peanut butter cups! These are made with homemade almond butter sweetened with organic agave nectar and dark chocolate. It's a breeze to make which means the little ones can help make these too, no baking required!

You can prepare the almond butter ahead of time and it will keep in the fridge for 6 months or longer. It's basically the same as my Dark Hazelnut Butter with the sub of blanched almonds (duh!) and no cocoa added. Try the recipe, I'm sure you'll love it!

Prep Time: 20 minutes
Inactive Time: 35 to 65 minutes

Ingredients for the Almond Butter Cups:
2 cups Ghirardelli 60% cacao bittersweet chocolate chips or any chocolate chips/bars you like
1 cup almond butter

You will need:
16 cupcake liners
cupcake pans
spoon
spatula
microwavable dish

Directions:

1. Place the chocolate chips in a microwavable dish. With the temperature set high, heat the chips at 30 minutes interval until most of the chocolates are melted. Careful not to burn it! Temper the chocolate to retain its gloss and shine when it hardens. For tips on tempering chocolate, check out this video from Alton Brown. Once melted and tempered, scoop 1 tsp of chocolate liquid in the cupcake liner and coat the bottom and the side of the liner halfway to the top. Do the same for the rest of the liners. Reserve the rest of the chocolate liquid for later.

3. Freeze the chocolates in cups for 5 minutes.

4. Once set, fill each chocolate cups with 1 tsp almond butter, press on the side for even cups. Then cover the almond butter with 1 tsp liquid chocolate. Make sure the almond butter is fully covered. Touch-up and make it pretty by swirling the top with a spoon. Refrigerate for 30 minutes to 1 hour. Take it out and leave it in the countertop for a few hours before putting in a jar or container. Be sure to pop one in your mouth for quality check ;-)

Makes 16 cups


And here's how to make Almond Butter:

Roasting Time: 10 minutes
Butter-making Time: 30-60 minutes (depending on your equipment and the level of smoothness of the butter)
Total Time: 40-75 minutes

Tools:
Baking sheet
food processor


Ingredients:
500 g  raw blanched almonds
4-5 tbsp agave nectar or organic, pure maple syrup
1/4 tsp salt
beans of 2-inch vanilla pods

Directions:
1. Preheat oven to 160*C. Place the raw almonds on the baking sheet and roast for 10 minutes, turning halfway through the roasting time. Keep a close eye on it; you only want a light to medium roast.

2. Transfer the almonds into the food processor. You may process the whole batch if you have a big food processor or you can grind half of it first. Grind the nuts until it forms a paste. This is where you'll need a lot of patience; the length of time will depend on how powerful your machine is and how smooth you want your butter to be*. Do not be tempted to add oil, you don't need it; the nuts will release its natural oil. I found that grinding the nuts while it is still warm makes it easier to release its oil. Once you get the desired consistency, add the agave nectar, salt and vanilla beans. Give it a whir for another 5 minutes until well combined. Transfer to jars and leave to cool completely before putting on the lid.
Note: For the batch I used for almond butter cups, I left it a little grainy so it will hold it's form.


Homemade Treats
30 March 2013


Saturday, May 11, 2013

Mixed Berries and Chocolate Chip Bread Pudding


Thinking of a gift for mother's day? Why not surprise your mom, (or the mom of your kiddos) to a breakfast-in-bed with this super easy bread pudding. It's so easy to make that I did it during my lunch break! It takes 5 minutes to prepare and 20 minutes to bake. How easy is that? However, if you have time, I would recommend you let the bread soak in the milk mixture for a good 20 minutes before you pop in the oven to absorb the flavor.

Difficulty: Easy

Ingredients:
4 slices of white loaf bread, cut into 1 inch squares
4 eggs 
1cup fresh milk 
1cup heavy cream 
1/2 cup sugar*
1/2 tsp cinnamon powder 
1 tsp vanilla extract
1/4 tsp salt 
a few shavings of nutmeg 
1 and 1/2 cups frozen mixed berries 
1/2 cup bittersweet chocolate chips 
maple syrup, to serve (optional)
*If not using maple syrup, sugar may be adjusted from 1/2 to 1 cup.


Directions:
1. Preheat oven to 200*c. 

2. Except for the bread, berries and chocolate chips, mix everything together in a saucepan over low heat. I don't intend to cook the mixture, I just find it easier to mix together when its warmed, 3-5 minutes. 

3. Butter 4 ramekins. Divide the bread, berries and choco chips into 4 ramekins. Pour over cream mixture (Note: If you're not in a hurry, leave it for 20 minutes in the fridge so the bread will soak up more of the cream). 

4. Put the ramekins into a roasting pan with water halfway to the ramekins and bake bain marie for  20 minutes. You may also sprinkle sugar on top 1 minute before you get it out of the oven and crank the heat to broil so you'll have a bruleed crust. But watch closely, you want the top bruleed not toasted.

5. Serve hot drizzled with maple syrup on top.

Serves 4.


Homemade on 23 April 2013